
We receive many inquiries regarding hardware for our forklift training simulator. What exact elements does the simulator consist of? How to assemble it properly? Can I do it on my own? These are just examples of the most common questions. This is why we decided to publish this guide – you will learn how to assemble a forklift training simulator from Flint Systems on your own.
First of all, if you don’t know much about our forklift training simulator, you can read more about it here.
Easy to mount and transport forklift training simulator
The exploitation of the forklift training simulator from Flint Systems is very easy and intuitive. A trainee needs just to sit with goggles on and listen to the guidance given by an instructor.
The simulator is also very easy when it comes to assembling and disassembling. It can easily be transported to some other place. In total, the simulator weighs 120 kg, and the process of assembling/disassembling takes approximately 40 minutes.
Flint Systems provides eight hours of assembling/disassembling training after each purchase. This time is sufficient to train several people.
What is more, the simulator is designed to be easily modified for another type of machine. For example, you can easily make a tower crane simulator out of the forklift simulator – you just need to replace a monoblock with joysticks (the steering wheel will then be inactivated).
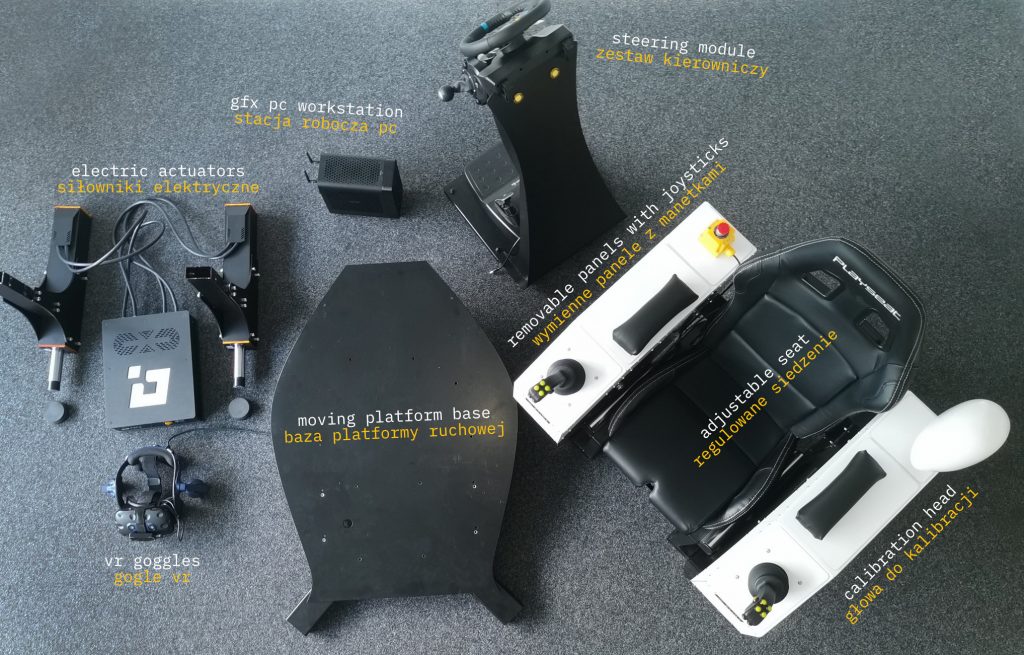
Parts of a forklift training simulator
The main parts of the forklift training simulator from Flint Systems are:
- Motion platform
- Emergency button
- Steering wheel
- Adjustable seat
- Removable side panels
- Electric actuators
- Rubber foot
- Hydraulic monoblock
- VR goggles
- PC
Safety during assembly and proper operation
Simulator hardware part assembly
In order to properly assemble the simulator, it is necessary to follow several steps in sequence:
1) The first is to mount the electric actuators to the platform floor. To do this, properly insert both cylinders into the platform floor. You can see what it looks like in the photo below
2) Lift the platform floor and attach rubber foot, screwed on a M20 bolt
3) Thirdly, mount side panels on the mounting strips. To do it correctly, first, mount the strips to the floor of the platform. Then screw the side panels
4) After mounting the side panels, screw the U-profile to them
5) Mount the adjustable seat on the seat base
6) Assemble the seat base with the seat on the motion platform
7) Screw the steering module
8) Installation of side panel covers (i.a. emergency button and hydraulic monoblock)
The result you should get after completing the eight steps is as follows:
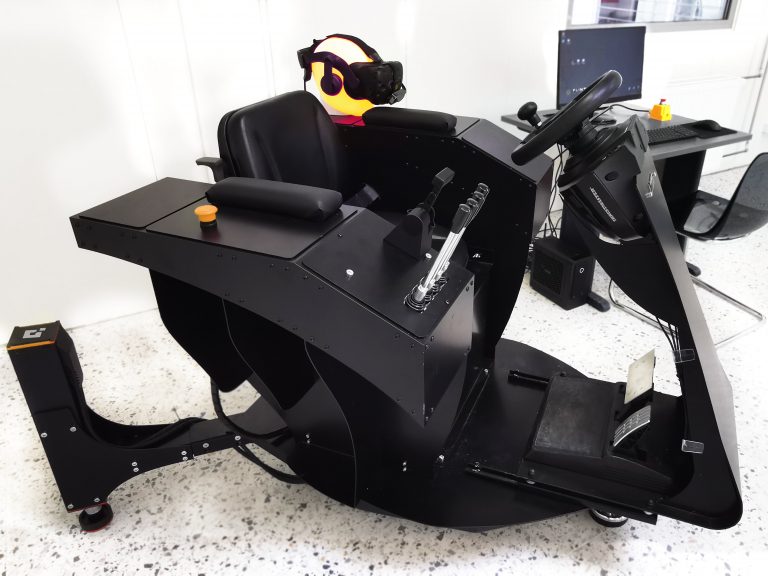
The forklift training simulator is now ready for training. We will write more about it in our next article!